You are here
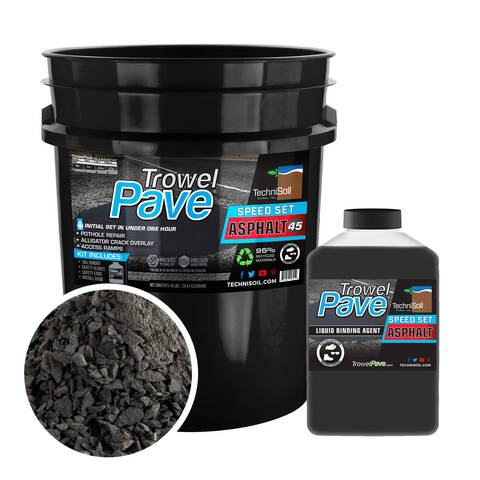
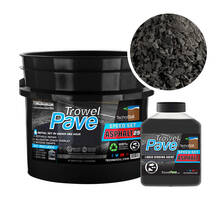
Technisoil 45lb TrowelPave SpeedSet Asphalt Leveler and Asphalt Patch Kit
- Cold applied asphalt repair patch
- 1/4" and smaller aggregate stones
- 2-part regular cure plasticomposite formula
- Great for all kinds of asphalt repairs
- Easy to use 45lb kit is perfect for home or business needs
Description
Asphalt Sealcoating Direct has always strived to bring professional-grade asphalt repair products that otherwise are not readily available to homeowners and smaller contractors or DYI’s allowing them to perform high-quality repairs, saving them thousands of repair dollars on driveways, parking lots and many other asphalt surfaces. The TrowlPave asphalt patch is just another example of the outstanding quality you can expect from us.
Performing regular maintenance on your asphalt driveway and roadways will ensure that your investment will last for many years. Any low spots and recessions such as bird baths or potholes in the asphalt surface that holds water, can eventually crack and allow moisture to penetrate the surface and substrate which will eventually cause a soft spot beneath the pavement, creating damaged asphalt, and if not repaired in a timely manner, will lead to complete driveway replacement.
This premium asphalt leveler is engineered for lasting durability and unique design allows you to use it on all kinds of projects. Its formula allows for easy application and its initial setup begins in about one hour. This product is designed specifically for depressions, birdbaths, curbing and build-ups and is a very durable epoxy-based asphalt overlay that will last many years if applied and used properly.
This long-term asphalt leveler and repair patching formula is ideal for areas that require thicker applications than our BIG A Alligator Repair, and where you have a need for a harder, more permanent patch than what you'll get from other Pothole Repair products. The TrowelPave "Easy Pour, Mix and Trowel” application process makes it ideal for DIYs or Homeowners and even business owners wanting to perform repairs on parking lots, driveways, cart paths, and any asphalt pavement surface.
Our TrowelPave lives up to its name because it can be troweled to a smooth finish using a basic concrete hand trowel and feathered into the existing pavement surface which minimizes the repair effects, or it can be tamped into potholes or bird baths and used to level the asphalt for smooth transitions. Since the TrowelPave is an epoxy asphalt based product, it will adhere to the existing pavement without a problem so you don't have to worry about it coming back out like you do other products.
TrowelPave is the only cold-applied asphalt patch that comes close and surpasses the quality of hot mix asphalt when applied correctly.
It's a 2 part kit that ships with 45lbs of aggregate and includes the binder liquid.
What's in the 2-part system? Part 1 = Aggregate, Part 2 = Binder. When the aggregate and binder mix together and the binder is exposed to ambient air temp and ambient moisture, it hardens, creating a much stronger bond than traditional cold patches. Note: The binder is shipped inside the bucket.
It is recommended to apply a tack coat to the patch area prior to installing TrowelPave for maximum adhesion and covering it with a quality asphalt sealer once it has cured for enhanced durability. Note: Only the Technisoil Tack Coat is recommended. It is specifically blended to work seamlessly with the TrowelPave product. Other tack coats will be absorbed by the TrowelPave instead of bonding with it.
TrowelPave Speed Set Asphalt is good for use on:
- Potholes
- Alligator Cracks
- Depressions
- Overlays
- Curbs
- Utility cut-outs
- Streets and highways
- Driveways and parking lots
- Golf cart paths
- ADA access ramps and more
Standard Application Solution
For the standard installation, simply mix the aggregate and binder together, then apply to the repair area. While this will probably work fine in small potholes, ramps, birdbaths and general potholes will greatly benefit from the premium application method outlined below.
Failure to go the premium route can cause the patch to pop out of potholes or birdbaths. If you're making a ramp, not tacking the area first can cause the ramp to be lifted away from the patched area, making it a useless repair. In contrast, the tack will glue the patch to the pavement which will save you time and money in the long run.
Premium Application Solution
While the TrowelPave can be installed as a standalone product, we recommend a 3-part installation process to ensure maximum bondage and longevity of the patch.
Really, all asphalt patches should have a 3 part process, but a lot of folks sacrifice the durability for cost because it's "good enough".
What we recommend is to first use a tack coat as a bonding glue between the patch and pavement. Second, is the patch and the third is a good quality sealer that will fill in all of the small holes and edges to protect from moisture.
For the TechniSoil TrowelPave products, they make their own tack coat which is designed specifically to do the job. Other tack coats will probably work just fine, but we have no long term experience with the results of third party tacks.
As far as the sealer goes, TechniSoil does make its own sealer, but really any asphalt brand of sealer should work just fine as long as it isn't a solvent-based sealer like most Gilsonites.
The Products
Part 1) Tack Coat
TechniSoil Tack Coat - Get the 38oz bottle of TechniSoil Tack Coat: Add to Cart
Part 2) Repair Patch
TechniSoil TrowelPave - Add the product on this page
Part 3) Sealer
TechniSoil ReThink Asphalt Protectant
BIGA Asphalt Emulsion Sealer
BIGA Coaltar Sealer
Tips & Tricks
Allowing Traffic
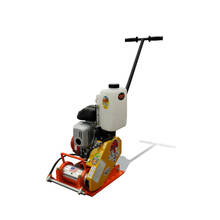
If you need to open the area back up to traffic immediately after installation, you will want to compact the area with a vibratory plate compactor. This will handle straight through traffic without causing issues. If you need to immediately open the area to turning traffic, grab a piece of plywood and spray a non-sticking oil or pam cooking spray (yes, we went there...) on the bottom side of the plywood and place it over the patched area. Give the area about an hour to fully cure before removing the plywood.
Straight Wall vs Bird Bath / Alligator
If you're repairing a straight wall pothole whether it's been cut or the walls are naturally nice and vertical, you'll have fewer issues during the cure time than if you're repairing a depressed area like a birdbath or alligator cracks. Give these areas plenty of time to cure before allowing traffic. We recommend the full 2 hours before allowing traffic. That said, since birdbaths are similar to potholes, you can place a piece of plywood over the area if you need to open the area back up to traffic. Just spray the bottom side of the plywood with some oil to keep the patch from sticking.
Cold Weather
Make sure you don't store the binder or tack coat where it can freeze. That said, the product CAN be used down to around 28-30º F without a problem, just make sure it is kept warmer than freezing before mixing.
25lb vs 45lb
If you're a homeowner or planning on a small project with this product, we highly recommend looking at the 25lb buckets instead. While it's a little more money, the smaller bucket is a lot easier to mix. The alternative is that you find an empty bucket and mix half of the aggregate over there. The main purpose of the 45lb buckets is to provide a nice quantity of aggregate for those planning to use a powered mortar mixing equipment. Just something to think about. The choice is yours!
TrowelPave Mixing Wand
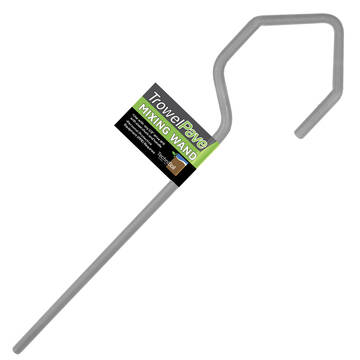
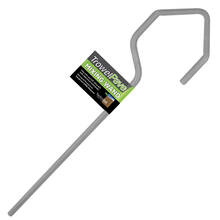
Since TrowelPave is a two-part product of aggregate and binder liquid, it has to be mixed. What better way to mix the two together if you don't have your very own cement mixer! The TrowelPave Mixing Wand is a 1/2" diameter solid metal mixer that is perfect for asphalt aggregate and other types of stiff mixing materials.
Add the TrowelPave Mixing Wand as an accessory: Add to Cart
TrowelPave Bucket Grip
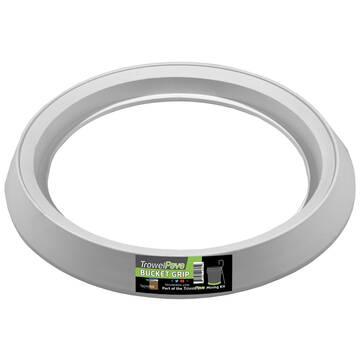
The TrowelPave Bucket Grip is a special holder that fits on the bottom of a 5 gallon bucket and allows you to hold the bucket in place with your feet when you mix it.
Add the TrowelPave Bucket Grip as an accessory: Add to Cart
Features
Strong, durable, permanent asphalt transition repair
Supports car, truck, forklift, & heavy equipment traffic
Leveling compound for adjoining uneven surfaces
Finish & compact with a standard concrete trowel
Commonly used for potholes, broken edges, alligator cracks, & more
Contains 95% recycled materials
Proudly manufactured in the U.S.A.
You Might Like
Specifications
Color | Black |
Aggregate Weight | 45 lbs |
Aggregate Size | 1/4" and smaller |
Recommended Use | Potholes, bird baths, alligator cracks, large cracks, unequal transitions, asphalt cut-outs, overlays |
Time to straight traffic (Compacted) | Immediate |
Time to straight traffic (Hand Tamped) | 1 hr |
Time to turning traffic | 2 hrs |
Volume | .38 cu ft per bucket |
2" Thick | 2.28 sq ft |
1" Thick | 4.56 sq ft |
3/4" Thick | 6.08 sq ft |
1/2" Thick | 9.12 sq ft |
1/4" Thick | 18.24 sq ft |
Instructions Overview
Preparation
PROJECT PLANNING
➢ Personal Protective Equipment (PPE) is mandatory.
- Safety glasses / face shield
- Impenetrable gloves
- Long sleeve shirt
- Long pants
- Close-toe shoes or boot
➢ For road and parking area repairs, consider traffic safety for repair and curing time.
➢ To reduce the non-operating time of a repair, increase the compaction value by using mechanical compaction via vibratory plate compactor or roller.
➢ Avoid icy or freezing conditions as it can extend the curing phase of the blended TrowelPave material.
➢ Calculate the amount of TrowelPave material needed by finding the cubic feet (or metric equivalent) of the project area.
- Use the coverage generalization chart for estimating purposes.
➢ Consider the amount of TrowelPave material needed, labor force, and allowable installation and curing time before starting a large project.
- This will reduce issues with excess material curing before there is time to install.
- Each individual TrowelPave batch should be installed no later than 10 minutes after mixing in normal temperature conditions (40º-90º F/ 4.4-32.2 C) .
Installation of TrowelPave Speed Set Asphalt
MIXING: TrowelPave Mixing Kit
➢ For best results, use the TrowelPave Mixing Kit (some items sold separately)
- TrowelPave Mixing Wand
- For use with ½” drill w/ steel chuck and side handle.
- TrowelPave Mixing Bucket
- 25lb (11.3 kg) Bucket Kit can be mixed directly in its own bucket.
- 45lb (20.4 kg) Bucket Kit requires an additional transfer bucket to mix per recommendations.
- TrowelPave Mixing Bucket Lid
- TrowelPave Mixing Bucket Grip
- Fits 25lb (11.3 kg) and 45lb (20.4 kg) Bucket Kits, and the Mixing Bucket.
➢ Insert Mixing Wand into drill and tighten.
➢ Attach Bucket Grip to bottom of Mixing Bucket.
➢ 25lb (11.3 kg) Bucket Kit
- Make a cone-shaped divot in the middle of the aggregate.
- Pour entire contents of liquid binding agent bottle into divot.
- Insert Mixing Wand and begin to spin, slowly at first, and then progressively faster.
- Take care to avoid spinning the binder out of the bucket before it is tilled into the aggregate.
- Mix thoroughly until the aggregate color is consistent (it will change colors from start to finish).
- Clean Mixing Wand and other accessories with WD-40® and a rag as needed.
➢ 45lb (20.4 kg) Bucket Kit
- Pour ½ of aggregate (approximately 20-25 pounds/ (9.1-11.3 kg) into Mixing Bucket.
- Make a cone-shaped divot in the middle of the aggregate.
- Pour approximately half the contents of liquid binding agent bottle into divot.
- Insert Mixing Wand and begin to spin, slowly at first, and then progressively faster.
- Take care to avoid spinning the binder out of the bucket before it is tilled into the aggregate.
- Mix thoroughly until the aggregate color is consistent (it will change colors from start to finish).
- Pour the remaining aggregate into Mixing Bucket directly on top of blended material.
- Make a cone-shaped divot in the middle of the aggregate.
- Pour remaining liquid binding agent bottle into divot.
- Insert Mixing Wand and begin to spin, slowly at first, and then progressively faster.
- Take care to avoid spinning the binder out of the bucket before it is tilled into the aggregate.
- Mix thoroughly until the aggregate color is consistent (it will change colors from start to finish).
- Clean Mixing Wand and other accessories with WD-40® and a rag as needed.
MIXING: Standard Equipment
➢ IMPORTANT! Mix entire contents of aggregate bucket and liquid binding agent bottle.
- The liquid binding agent should not be stored or reused after opened.
➢ Pour TrowelPave aggregate contents into an appropriately sized mixing container.
- Wheelbarrow
- Mixing basin or tub
- Poly or steel drum paddle mixer
➢ Pour liquid binding agent over aggregate mix.
- IMPORTANT! Avoid pouring liquid onto mixing container walls or mixing tools.
- If mixing on a concrete or hardscape surface, place a tarp below to catch any accidental spills.
- Pour entire contents of bottle over aggregates.
➢ If mixing a wheelbarrow or basin, use a mixing tool to sweep dry aggregate mix over the top of the liquid binding agent.
➢ Once uniformly covered, begin mixing in a back and forth motion and turn over to mix material thoroughly.
- TIP: Use back side of shovel to drag materials up the sloped edge of the front of a wheelbarrow during mixing.
- TIP: In between shovel or garden hoe mixing, lean wheelbarrow on its back legs and then forward on the wheel to disperse material better.
➢ Aggregate mix should uniformly change color throughout once properly mixed (usually a darker color than dry material).
➢ If mixing with a electric or gas powered mortar mixer with paddles, mix until aggregates are a consistent color (as explained above).
- IMPORTANT! Do not use a cement mixer as it will not mix aggregate and liquid binding agent thoroughly because of the flopping action while spinning.
➢ IMPORTANT! TrowelPave Asphalt - Speed Set is designed to cure up to 5 times faster than the TrowelPave Asphalt - Regular Set product.
- Initial set will typically occur within 1 hour in optimal temperature range of 50º-90º F (10-32.2 C), at which time the repair area can be opened for use.
- Initial set is the stage at which the blended material bonds at the surface level allowing minimal abrasion.
- Allow 24-72 hours for complete cure.
➢ IMPORTANT! For best results, do not install over standing water or during a heavy rain event except in emergency situations.
- Damp situations are suitable for repair
- In repair areas with standing water, remove excess standing water before installing TrowelPave.
➢ TrowelPave can be used to repair freeform areas from ¼” (6.4 mm) up to 4” (10 cm) with varying levels of depth throughout.
➢ In areas deeper than 4” (10 cm) it is recommended to install a crushed base rock material as a subbase for the TrowelPave material.
➢ IMPORTANT! Blended material should be installed within 10 minutes of mixing.
- If working in a large area, plan mixing output accordingly to match installation speed.
➢ For best results, clean repair area thoroughly and remove any loose dust and debris.
- Keep the repair area dry.
- If water or pressure washing is needed, allow the area to dry before proceeding.
- Chip loosely connected surface materials out to help prevent future deterioration of existing asphalt or concrete.

