Before you get started with this guide, we want to let those of you who found this page from the internet know that we also offer the products and equipment to help you sealcoat a driveway or parking lot. We sell to both Professional Sealcoaters as well as DIY Home Owners, Small Business owners, Property Maintenance, Municipalities, Runway Authorities etc. Feel free to shop around, but you will probably find that we already have some of the best prices around on the internet.
Our guide is very in-depth on how to sealcoat a driveway, parking lot or any asphalt surface. It will walk you through how to sealcoat whether you are new to the business or a home owner looking for ideas on how to do it yourself. There really isn't much to it but keep in mind that a few steps are very important to the whole process like proper preparation. Sit and read the guide or print it off for later, we don't mind either.
CONTENTS
- 1.0 Sealcoating Introduction
- 1.1 Benefits of Sealcoating
- 1.2 Conditions Conducive to Long Lasting Sealcoats
- 2.0 Materials Used in Sealcoating
- 2.1 Refined Coal Tar Emulsion
- 2.2 Asphalt Emulsion Sealcoatings
- 2.3 Always remember that sealcoatings will not:
- 2.4 What sealcoating will do:
- 3.0 Asphalt Pavement Preparation & Application
- 3.1 Your Sealcoating performance depends
- 3.2 Insure the following to allow maximum performance
- 3.3 Asphalt Pavement
- 3.4 Cleaning of the Pavement
- 3.5 Crack Filling & Repairs
- 3.6 Filling the Cracks
- 3.7 The Different Types of Cracks and Their Causes
- 3.8 Patching Damaged Asphalt Sections
- 3.9 Oil Spots; Priming & Other Treatments
- 4.0 Mixing the Sealer for Your Sealcoating Jobs
- 4.1 Water
- 4.2 Aggregates (Sand / Slag)
- 4.3 Additives
- 5.0 Sealcoating
- 5.1 General
- 5.2 Weather Conditions
- 5.3 Coverage rate
- 5.4 Drying Time
- 5.5 Equipment
- 5.6 Step-by-Step Summary
- 5.7 Tips
1.0 SEALCOATING INTRODUCTION

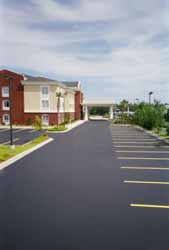
Sealcoating is a true "Barrier coat" between asphalt surfaces and destructive elements. The term "sealcoating" means keeping the redeeming properties of asphalt sealed in to prolong the pavement's life and preserve its functional properties.
1.1 Benefits of Sealcoating
The primary reason to sealcoat asphalt pavement is to protect the pavement from the deteriorating effects of sun and water. When asphalt pavement is exposed to sun, wind and water, the asphalt hardens or oxidizes. This causes the pavement to become more brittle. As a result, the pavement will crack because it is unable to bend and flex when exposed to traffic and temperature changes. A sealcoat combats this situation by providing a waterproof membrane which not only slows down the oxidation process but also helps the pavement to shed water, preventing it from entering the base material.
A secondary benefit of seal coating is an increase in the surface friction it provides. This is accomplished by the additional texture the cover aggregate adds to the pavement. With time, traffic begins to wear the fine material from an asphalt pavement surface. This result in a condition referred to as raveling. When enough of the fine material is worn off the pavement surface, traffic is driving mostly on the coarse aggregate. As these aggregate particles begin to become smooth and polished, the roadway may become slippery, making it difficult to stop quickly. A sealcoat increases the pavement texture and increases the surface friction properties.
1.2 Conditions Conducive to Long-Lasting Sealcoats
Sealcoats are affected greatly by weather conditions, especially during construction. The ideal conditions are a warm, sunny day with low humidity. Humidity and cool weather will delay the curing time and cause the seal coat to
be tender for a longer period of time making it more susceptible to damage by traffic. Rain can cause major problems when sealcoating. If the asphalt binder has not cured, it can become diluted and rise above the top of the cover
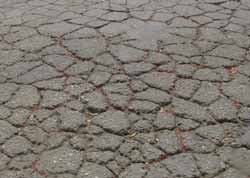
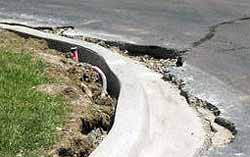
aggregate. After the water evaporates, asphalt may cover the entire surface causing tires to pick up aggregate or track the binder across the surface. Seal coating should never be done when showers are threatening. Asphalt to be seal-coated should also be in relatively good condition. This means that there should be little if any, load-related distress such as alligator cracking, rutting, and potholes. If these conditions exist, the driveway should not be sealed unless it is repaired first.
In summary, seal coating is a good maintenance technique for pavements with the following:
- Low to moderate block cracking.
- Low to moderate raveling.
- Low to moderate transverse and longitudinal cracking.
- A smooth surface with low friction numbers.
2.0 MATERIALS USED IN SEALCOAT
2.1 Refined Coal Tar Emulsion
The most commonly used sealcoatings are based on refined coal tar. Coal tar is made up of very stable chemicals that are closed ring-Aromatic compounds. They are not affected by the destructive elements of weather.
2.2 Asphalt Emulsion Sealcoatings
Asphalt emulsion-based coatings have gained considerable acceptance because of its ease of application and lower odor and less skin irritation than coal tar sealers. Although asphalt emulsion-based coatings do not have resistance to
gasoline, oils, fats, etc., they work very well in maintaining the surface integrity of asphalt pavements and keep cracks from appearing.
2.3 Always remember that sealcoating will not:
Compensate for pavement defects. They are intended as a protective coat; not as crack filler or leveling material. Sealer is only as good as the asphalt pavement to which it is applied. Prevent the cracking of bituminous pavements, which are caused by excessive voids, poor mix stability, insufficient compaction, poor drainage, or low-use areas.
2.4 What sealcoating will do:
If you want to apply asphalt sealer to your pavement, it's important that the pavement is in good condition to start with. This means it should have been built with the right designs and materials that are suitable for the climate and usage, and constructed over a well-drained base.
If the pavement has any cracks or unevenness, and you apply asphalt sealer on top of it, the sealer can actually make those imperfections more noticeable. This is because the sealer makes the surface smoother and more uniform, which contrasts with the rougher texture of the damaged pavement.
That's why it's important to fix any existing cracks or damage before applying the sealer. By doing so, the sealer can provide the protection it's meant to, and help extend the life of your pavement.
3.0 ASPHALT PAVEMENT PREPARATION & APPLICATION
3.1 Your Sealcoating performance depends on the following:
- How is the asphalt pavement condition?
- What is the preparation needed?
- What kind of application is needed? (Coverage rates, number of coats)
- What are your curing conditions? (Ambient & surface temperatures, humidity upcoming weather conditions)
3.2 Insure the following to allow maximum performance:
3.3 Asphalt Pavement
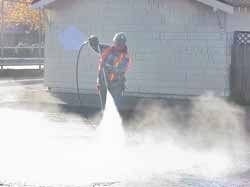
3.4 Cleaning of the Pavement
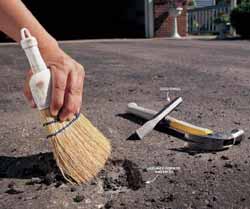
3.5 Crack Filling & Repairs
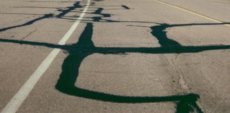
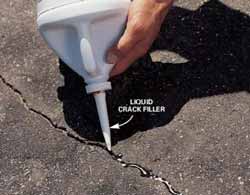
3.6 Filling the Cracks
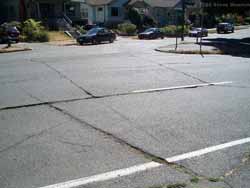
3.7 The Different Types of Cracks and Their Causes
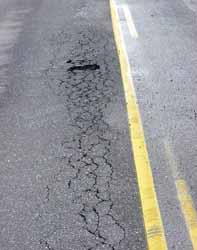
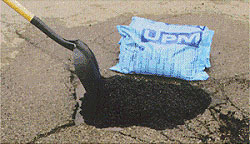
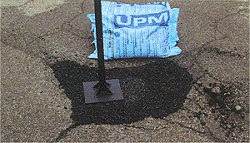
3.8 Patching Damaged Asphalt Sections
3.9 Oil Spots; Priming & Other Treatments
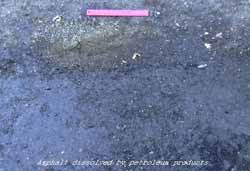
The oil and grease spots must be cleaned and scraped to remove as much of this material as possible. These spots should then be treated with an oil spot primer and allowed to dry. Acrylic emulsion-based primer that bonds tightly
with oil-spotted asphalt surfaces and stops them from coming through seal coatings.
4.0 MIXING THE SEALER FOR YOUR SEALCOATING JOBS
Refined coal tar-based sealers, are supplied as concentrates (undiluted). Before application, they must be mixed with water, aggregates such as silica sand or metal slag, and additives (as needed) for proper application consistency and properties.
4.1 Water
- Water is added to give proper fluidity to the mix
- Clean, potable
- Free of suspended solids and metal contaminants
- Between 7-8 pH
Too little water and the mix will be too heavy and will not spread evenly. The excessive sealcoat will be a waste of material and may also cause tracking under hot conditions.
Too much water and the mix will be too thin and thin cured film will cause the sealer to wear out prematurely. As a result, performance will suffer.
4.2 Aggregates (Sand / Slag)
- Uniform Texture
- Reduced Sun Glare
- No Streaking
4.3 Additives
Additives are rubber latex-based products, which are added to the sealer to boost its performance or to impart a special property.
Some of the benefits of latex rubberizing additives:
MIX DESIGN EXAMPLE
| Use | Coats | Seal Gallon | Water Gallon | Sand 100 lbs | Latex Gallon | Application Mix Gal/Sq. Yd |
| Low Traffic | 1st | 100 | 30-50 | 3-5 | 0-4 | 0.10-0.15 |
| 2nd | 100 | 25-45 | 0-4 | 0-4 | 0.08-0.12 | |
| Moderate Traffic | 1st | 100 | 40-60 | 3-5 | 2-5 | 0.10-0.15 |
| 2nd | 100 | 40-60 | 0-4 | 2-5 | 0.08-0.12 | |
| High Traffic | 1st | 100 | 30-60 | 3-5 | 2-5 | 0.10-0.15 |
| 2nd | 100 | 30-60 | 3-5 | 2-5 | 0.10-0.15 | |
| 3rd | 100 | 25-55 | 0-4 | 2-5 | 0.08-0.12 |
5.0 SEALCOATING
The following is intended to give you a general account of coal tar-based seal coatings and their application. Follow your manufactures recommendations.
5.1 General
Two coats allow the sealer to penetrate the newly formed aggregates for a deep coating. However, once the driveway has been sealed, this deep penetration is no longer necessary as long as you have a good maintenance program.
5.2 Weather Conditions
5.3 Coverage rate
- First Coat - 0.10-0.12 gallon of undiluted sealer/sq. yard
- Second Coat-0.06-0.08 gallon of undiluted sealer/sq. yard
- 45-50 sq. feet per gallon of undiluted sealer
5.4 Drying Time
The final coat must be allowed to dry a minimum of eight hours of good daylight drying conditions before opening to traffic, and initially cure enough to drive over without damage to the sealcoat.
If marginal weather conditions exist during this eight-hour drying time, additional time will be required. In some cases, this could exceed 24 hours.
Check the surface after this for traffic-ability before opening it to vehicle traffic.
5.5 Equipment
Use application equipment that is capable of applying the required coating rates evenly over the entire width of the application mechanism to provide a uniformly coated surface. To insure this, equip all spray units with a pumping
distribution. Equip all squeegee/brush units with squeegees/brushes that are properly adjusted and in a condition so that the application of seal coat materials is without streaks.
Use of hand squeegee or brush application is to be restricted to places not accessible to the mechanized equipment or to accommodate neat trim work at curbs, etc. Material that is applied by hand is to meet the same standards as that applied by a machine.
5.6 Step-by-Step Summary
5.7 Tips
Please see more information regarding Coal Tar environmental issues and hazards Here
6.0 BIDDING
Inspect the project, making notes of the asphalt conditions, cracks, and patching. Will you need special treatments such as oil spot primer, etc. Figure your costing to get to the final bid price (your costs + profits). A bid proposal should include all the details of what you're proposing to do.
- Examples:
- Seal coat sealing with one or two coats.
- Crack filling what you charge a linear foot and which crack fill you're using.
- Striping.
- When you can start and/or when you will finish.
- Crack filling what you charge a linear foot and which crack fill you're using.
6.1 Considerations
Bid pricing will cover some small repairs and all cleaning and preparation of the pavement prior to the application of two coats of coal tar emulsion sealer.
Some considerations in your pricing are as follows:
- Very dirty pavement - will increase the labor cost of cleaning.
- Extensive structural cracks - will increase the cost to clean and fill prior to sealing.
- Pavement repairs - can greatly affect the cost of the job.
- Coarse pavement surface - will result in higher material usage and increase the cost.
- Irregular pavement shape - will increase labor cost on the job.
- Manual application - will increase labor costs.
- Doing jobs in sections - lowers efficiency and increases labor costs.
- Travel time - long trips to a job will increase labor costs.
- Extensive curb work - increases labor costs.
- Multi-color work - increases labor costs.
- Time of season - slow drying time can hold up application and increase labor costs.
- Inexperienced crew - increases labor costs.
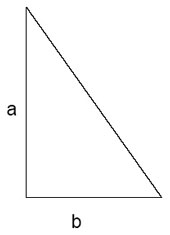
6.2 Measuring the area


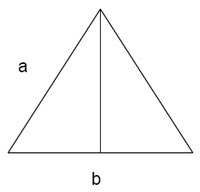
6.3 Helpful Measuring Hints
6.4 Some Useful Measurements to Help You Along
- 1 Gallon of water weighs 8.33 lbs.
- 1 Gallon = 4 Quarts = 8 Pints
- 1 Square yard = 9 Square Foot
- Square Foot/Gallon = 9 * square yard/gallon
- Mil Thickness = 1/1000 of an inch = .0001 inch
- Wet film Thickness (mils) = 1604/Sq. Ft. covered by one gallon of a coating.
- Dry film Thickness (mils) = Wet film thickness (mils) * % Solids by Volume
- Wet film thickness = 1604 / 50 = 32 mils
- Dry Film Thickness = 32 x 40% solids content = 12.9 mils
For the proper perspective of mil thickness, a sheet of paper is 4 mils. That means two coats of sealer fully cured will be a bit thicker than 3 sheets of paper.
Material needed for a given area for two (2) coats:
- Total square feet divided by 50 = gallons needed Total
- Square yards divided by 5.5 = gallons needed
Bid price for the job:
- Total square feet x unit cost per foot = Total cost
- Total square yards x unit cost per yard = Total cost
7.0 STRIPING
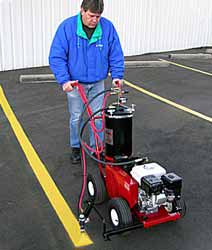
There's one thing for sure. You can take a perfect paving or sealcoating project (which may be 98% of the project's value) and completely ruin the appearance of the whole job in the last 2% with a sloppy striping job. Straight, crisp clean lines and stencils are a must. Calking of all lines on a new layout job will insure straightness.
